Workflow Schedules
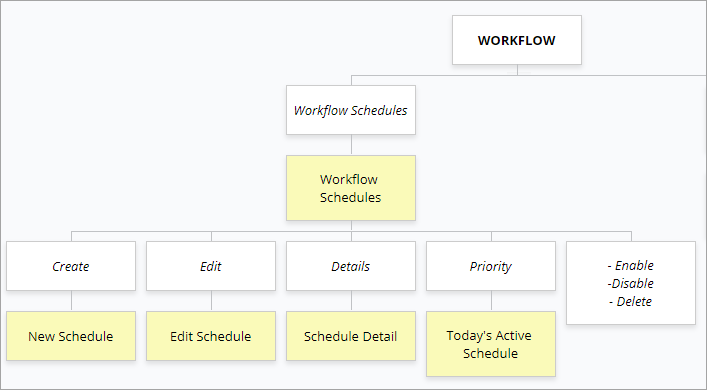
Menu map
About schedules
Workflow schedules may be created to run one or more workflows at specified times.
To access Workflow Schedules, select Workflow > Workflow Schedules from the portal main menu.
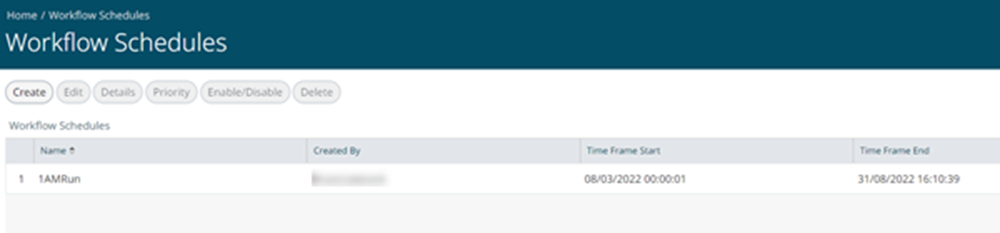
Example
This example shows some schedules already created.
Creating a schedule
To create a new workflow schedule:
- On the Workflow Schedules page, click Create.
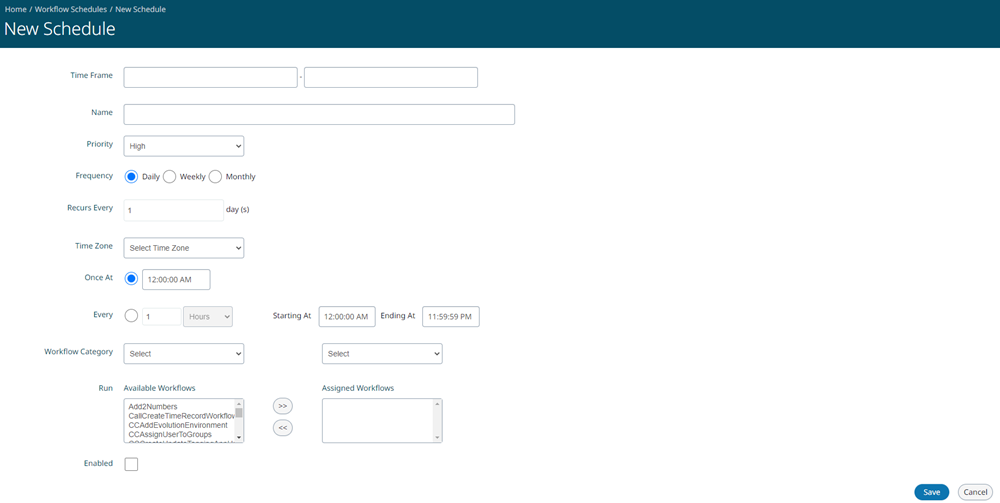
- On the New Schedule page, enter details for the new schedule. An example is given below.
- Click Save.
Example schedule
Tags: One or more tags can be added to identify or categorise the schedule. Scheduler tags are managed in the Manage Scheduler Data Tag page in the main menu, Data > Scheduler Data Tag. See Scheduler Data Tags.
Priority: The priority for a schedule may be set to Low, Medium, or High (default), and is used to determine the order of execution when two or more workflows are scheduled to run at the same time.
Workflow Category: Use the Workflow Category drop-down list to filter the Available Workflows list. You can use it repeatedly to select and add workflows from different categories to the Assigned Workflows list.
Enabled: You must select Enabled to make the workflow operational at the configured times. The operational state is reflected in the IsActive flag in the Workflow Schedules list.
To change the operational state, you can edit the schedule and change the Enabled check-box, or use the Enable/Disable button on the Workflow Schedules page.
Editing a schedule
To edit a workflow schedule:
- On the Workflow Schedules page, select the schedule in the list and click Edit.
- On the Edit Schedule page, make the required changes and then click Save.
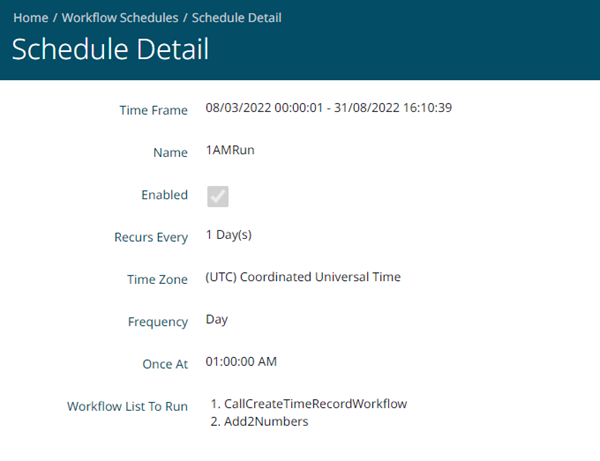
Schedule details
This feature shows the schedule settings without editing.
Example
Priority
The Priority menu item manages schedules that will run during the current day. It displays a list that can be filtered by priority.
Example
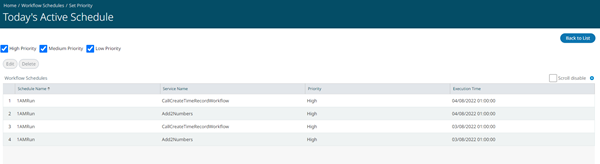
Note | The Edit and Delete buttons only affect the schedule for the current day; they do not change the schedule configuration.
- Edit: for a selected schedule in the run list, the Edit button displays a pop-up where you can change the priority and scheduled time for this item for the current day.
- Delete: removes the selected item from the run list for the current day.
Enabling or disabling a schedule
This setting is reflected in the Is Active flag in the Workflow Schedules list.
To enable or disable a trace definition:
- On the Workflow Schedules page, select the schedule and click the Enable/Disable button.
- On the pop-up, click Continue.
Deleting a schedule
To delete a trace definition:
- On the Workflow Schedules page, select the schedule and click Delete.
- On the Delete Workflow Schedule pop-up, click Continue.